Snail Pie
- Nutrition Facts
- Calories: 299
- Protein: 10
- Fats: 15
- Carbohydrates: 29
- Information
- Time: 3 hours 30 mins
- By: Ilili-bbog
- Ratings 4
- Your ratings:


Dear friends, HozOboz has prepared something fascinating and extremely delicious for you today! We’re going to cook not just a simple pie, but a snail pie. Also, we’ll learn how to make a proper puff pastry for such a pie. So, let's start!
Some ideas on the origin of the snail pie
Of course, it’s hard to say who was the first in the world to cook a snail pie. Nevertheless, we can easily assume from the facts we have, that it was someone from Mediterranean since that kind of pie was widely spread in the area of Greece.
Advantages of eating pies
The majority of pies are actually healthy enough just because they are delicious. However, the advantages we got from it, is only about our taste receptors, not the brilliant shape of our body. But remember, you will easily keep fit, if you do not consume too much pastry and choose healthy toppings for you pie, just as we do today.
Key elements to cook a snail pie
Dough #1:
- 200 grams of butter
- 2/3 glass of flour
Dough #2:
- an egg
- cold water
- 2 glasses of flour
- 1/4 teaspoon of vinegar
- a pinch of salt
Filling:
- 500 grams of cottage cheese
- 4 tablespoons of sugar
- 2 eggs (1 for greasing)
The instructions to prepare a snail pie
- To start with, we make the dough #1. Just take 2/3 glass of dough and add to the deep bowl or blender which can significantly speed the whole process up.
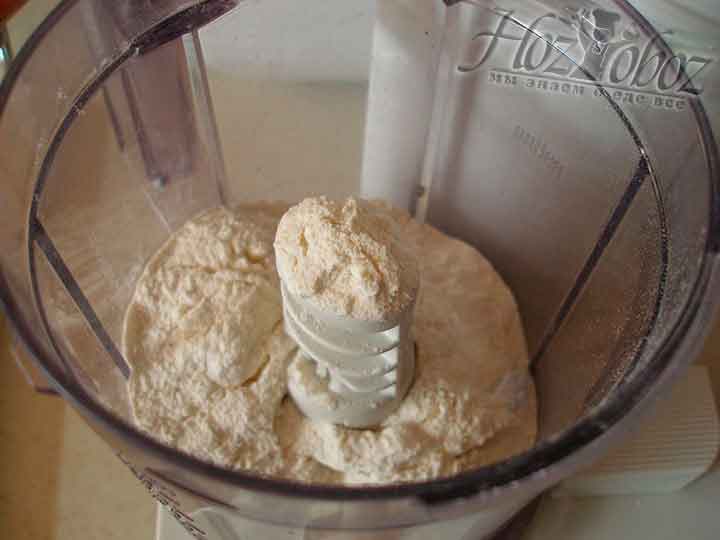
We have 2 recipes of dough here. To make the first one, add 2/3 glass of flour to the bowl of blender.
- Then take chilled butter (really cold, right from the fridge), cut it into small slices and place them into the bowl with flour.
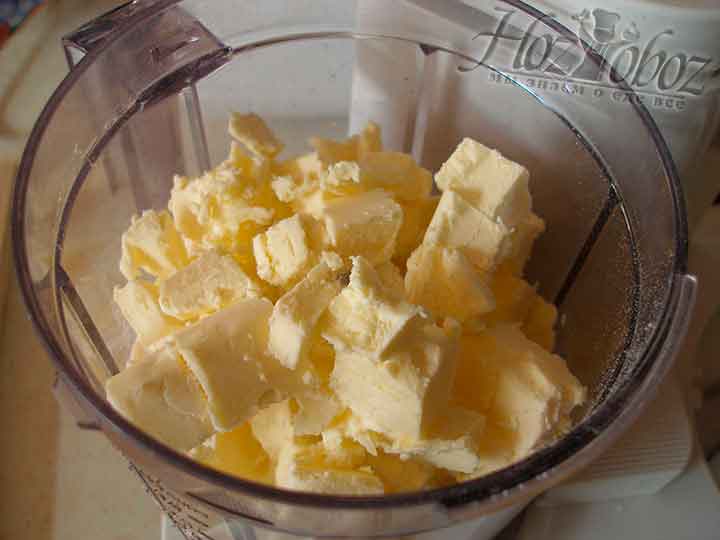
Cut the frozen butter and put it into the bowl with dough.
- The whip the butter with dough using blender. The important thing here is to mix it thoroughly so that the dough #1 will be distributed thoroughly on the dough #2.
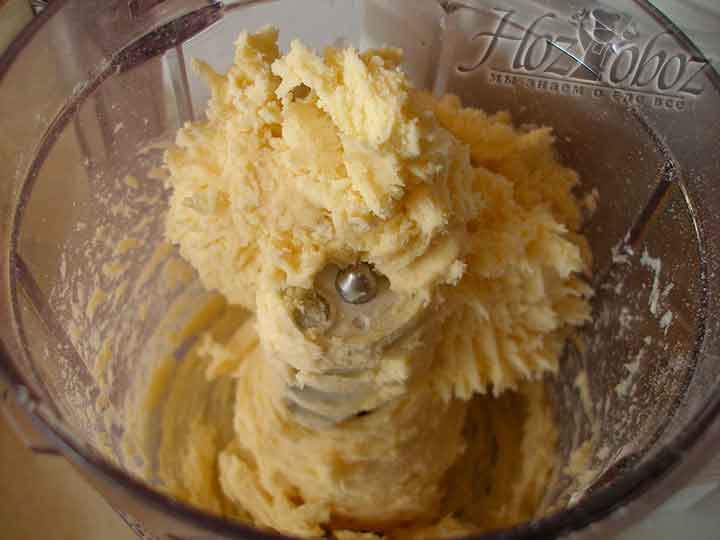
Now turn on your blender and whip the butter with dough. Most importantly, mix it very well not to leave even small pieces of butter.
- Do not knead the dough, just take it and shape something like a ball of it. Then wind it around with the plastic wrapping and send it to the fridge, so that it doesn't melt.
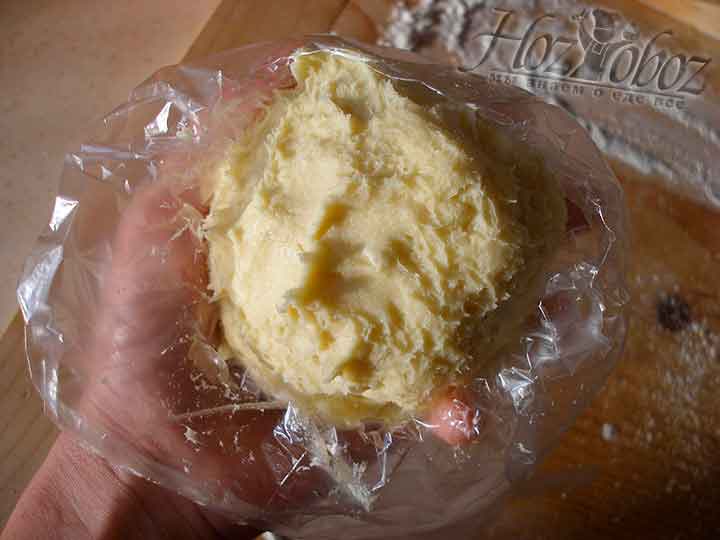
You don’t have to knead such a dough, just take it with your hands and form a ball, then place it into refrigerator.
- Now we the preparation of the dough #2. Add the dough into a deep bowl, add salt and vinegar to it.
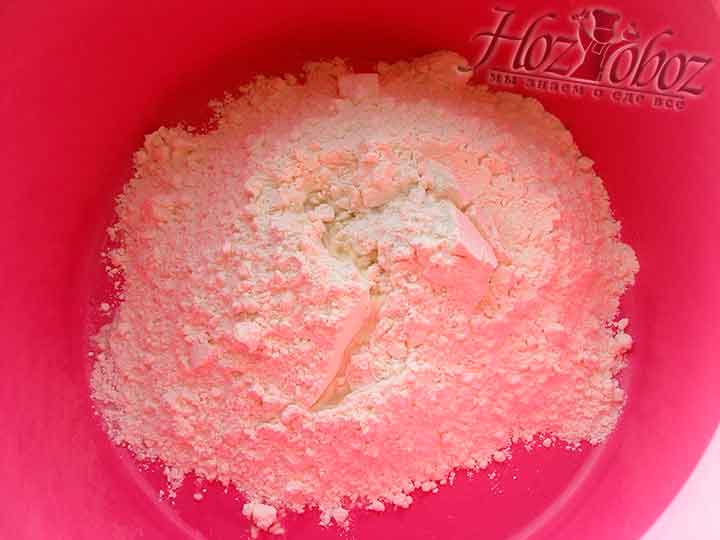
To prepare the dough #2, add the dough, salt and vinegar into the bowl.
- Whip an egg separately.
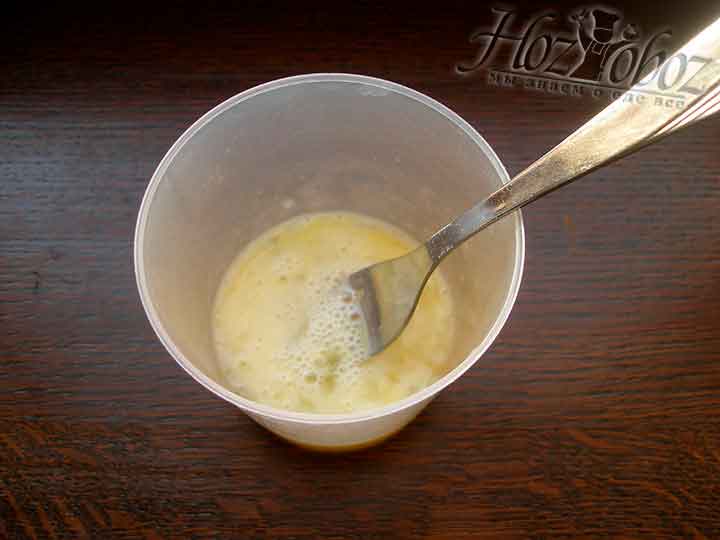
Whip an egg up in a separate bowl.
- Then add some room temperature water to the egg so that the mixture occupied the 2/3 of the glass. Then mix everything.

Pour some room temperature water so that the glass will be 2/3 full. Whip them up.
- Pour the mixture into the deep bowl with dough.
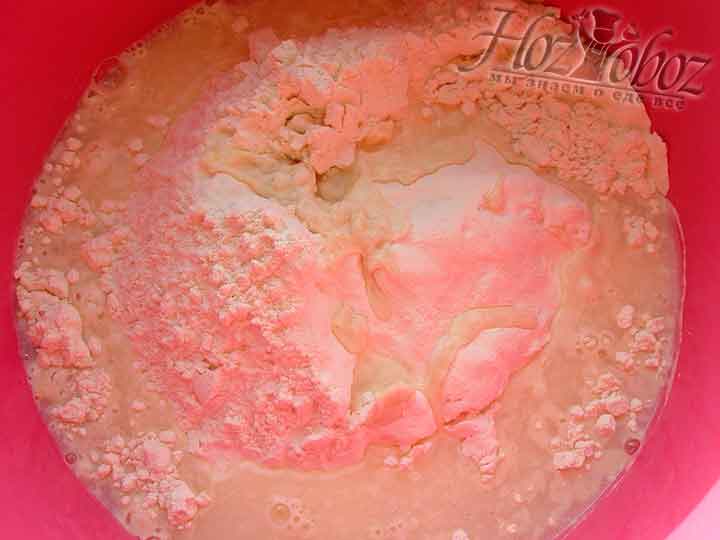
Add the water with egg to the dough.
- Whip the dough up thoroughly. You may use a spoon to begin, then take it out of the bowl and place on the floured surface where you should knead it with your hands. You may also add more flour if you want to. As a result, the dough should be very soft and ductile and not to stick to your hands.
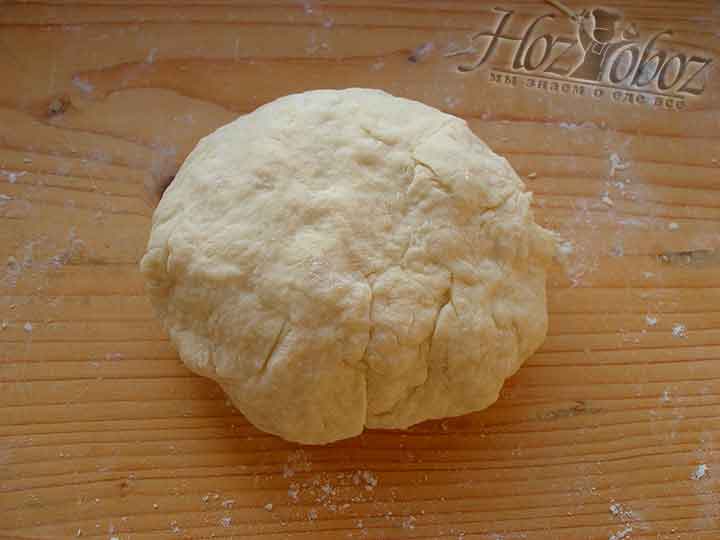
Knead the dough and place it on the floured surface, then make it more elastic and soft.
- Roll out the dough into a rectangle, even very rough one will do. But don’t make it the dough too thin so that it doesn't tear.
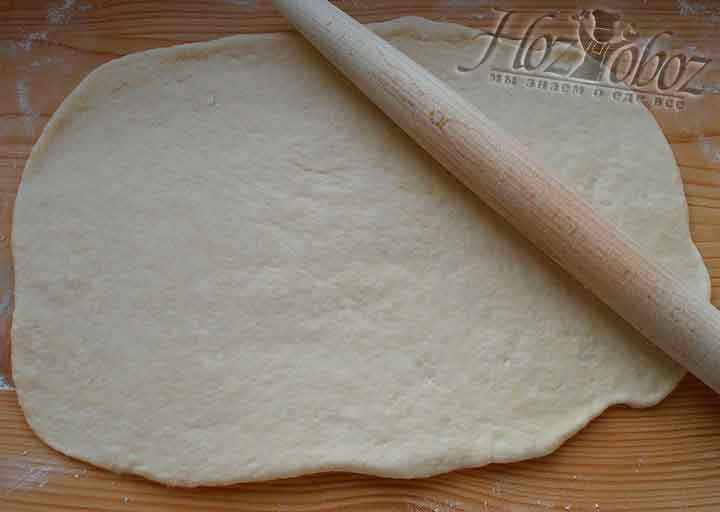
Shape the dough into a rectangle. It’s important no to make it very thin so that it doesn't tear.
- Place the dough #1 onto the dough #2, but no in the middle but just as you see on the picture attached.
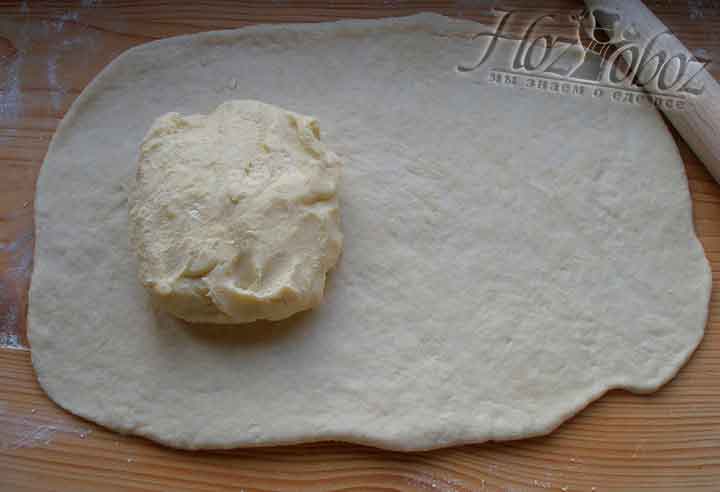
Now place the dough #1 onto the rolled dough #2 just like the picture shows.
- Now fold the dough #1 into the ‘’envelope'' made of dough #2. Star doing it from the side with bigger amount of dough then do the same from above, from below and from the side with small amount of dough.
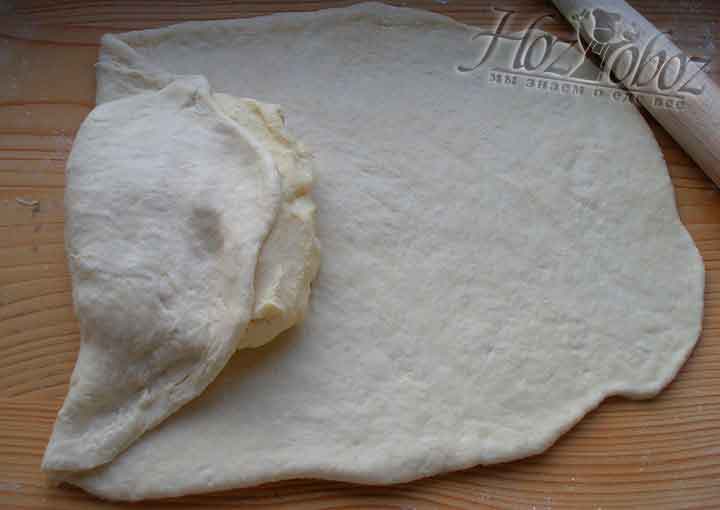
Now fold the dough #1 into the envelope of dough #2 and fold all the sides of it: on the left first, than down, up and finally on the right.
- Here we got an ‘’envelope’'. Place the dough on the floured plate, seam to the bottom. Then put it into fridge for half an hour. It’s important not to use the plastic wrap to avoid condensation.
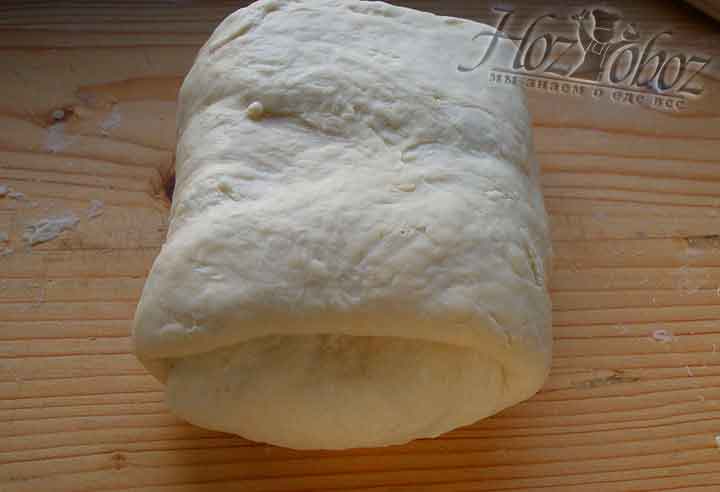
As a result, you’ve got an envelope which should be placed on the plate (seam to the bottom) and sent into refrigerator for 30 minutes.
- Take the dough out of the fridge, roll it and fold it into envelope again, but without dough #1 as it has already joined the dough #2 during the rolling. Place it into the fridge for half and hour again and repeat paragraph 12 once more.
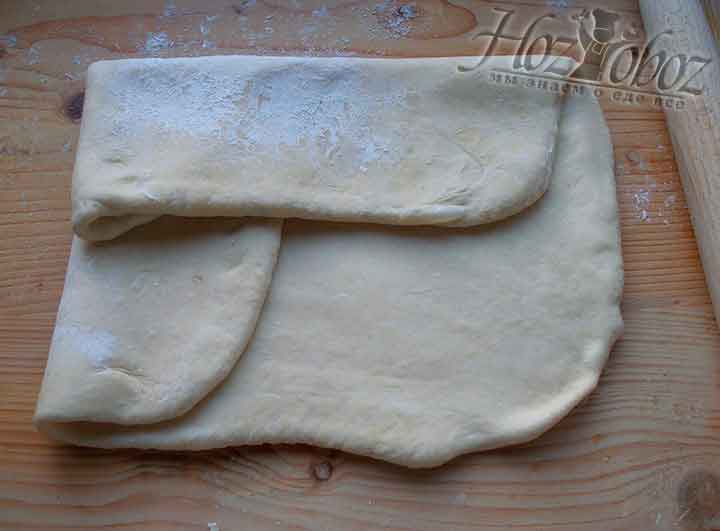
After 30 minutes take the dough out, roll it and fold it into envelope again. Now it should be kept in the fridge for 30 more minutes. You should do the same thing for about 12 times - it will provide the firm connection between the dough #1 and #2 and desired puff pastry effect.
- The dough his ready now. Can you see these beautiful layers? You can have exactly the same! If you want to go on cooking tomorrow, just leave in the fridge after packing it into the plastic wrapping. You can also keep it in the 'freezer, and when you’re ready to cook - take out and unfreeze it.
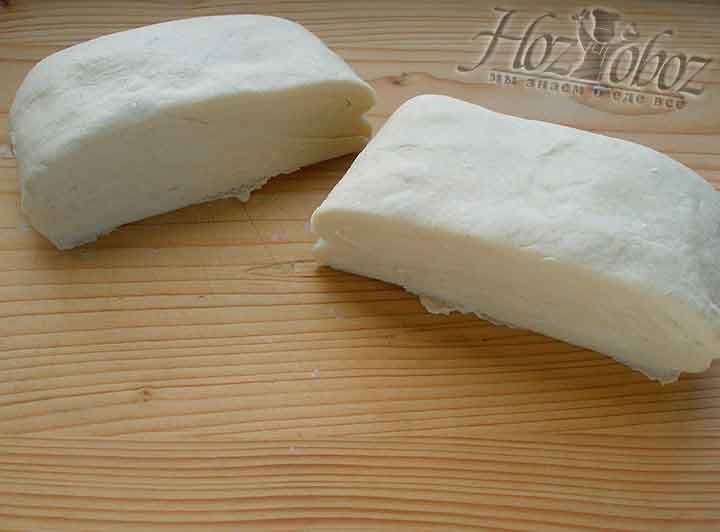
Finally, the dough is ready and it looks just like on the picture we provided. By the way, you can cook the dough prior since it's perfectly stored in the freezer.
- Now it’s time for the cottage cheese filling. And you can’t imagine how easy it is! Put the cottage cheese into the bowl, push it a bit with a fork and add some sugar.
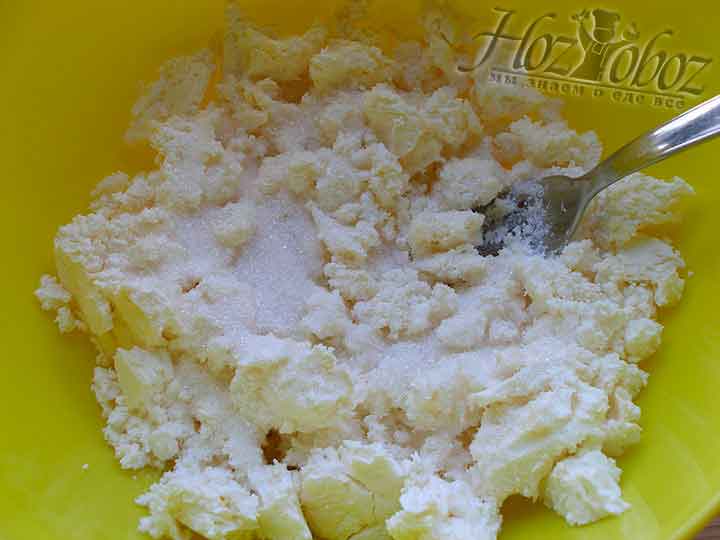
To make the filling put some cottage cheese into a bowl and add sugar powder to it. Then mix it using a fork.
- Add an egg to the cottage cheese, whip everything thoroughly.
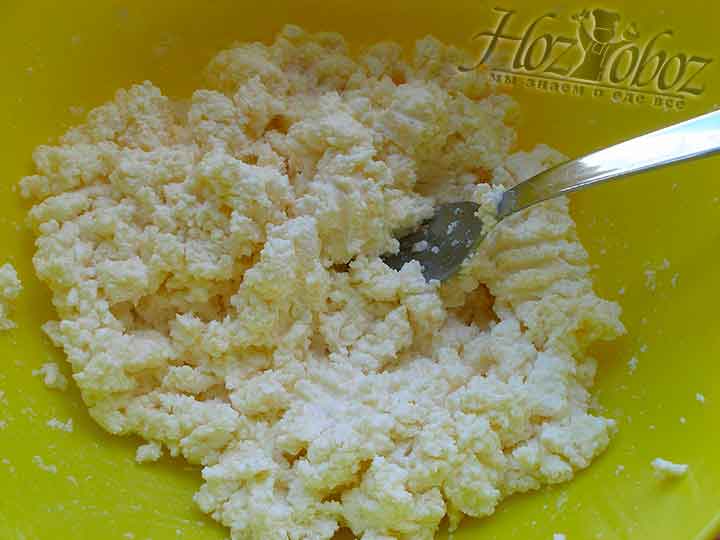
Brake an egg in the filling and mix everything once more.
- Now we going to make some elements of the snail pie and we start with the tubes with cheese filling. Firstly, divide the dough into 4 parts and roll each of them shaping long rectangles. There is no need to achieve perfection here because the edged of the tubes will be joined anyway and during the preparation of the dish the tubes should put upside down (seams to the bottom).
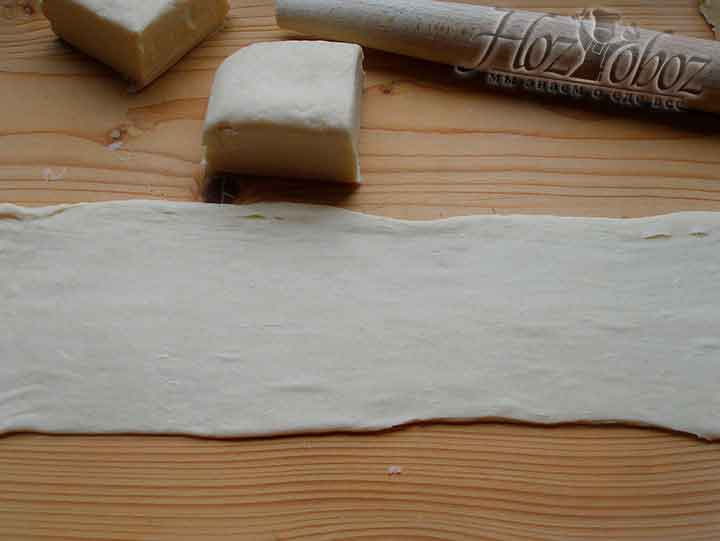
Divide the dough into 4 pieces roll each of them into rectangle.
- Then place the filling on the dough just like we did on the picture.
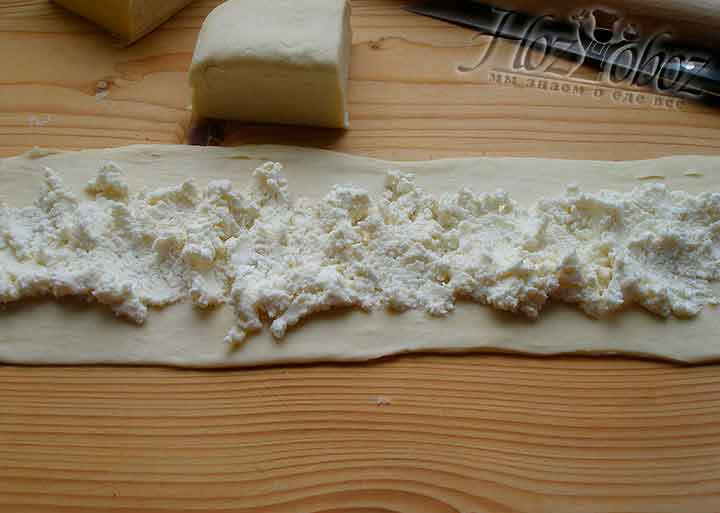
Place the filling on each triangle in accordance with the photo.
- Now wrap every tube and join the edges firmly. You will have something resembling a snake. But it doesn't really matter since it won’t affect the taste of the pie.

Now roll the tubes and connect the edges to get such a long piece of dough.
- Lay out the first tube in the spiral way starting from the middle of the baking dish. It’s preferable to lay the baking dish with the parchment. We have 9,5’' dish.
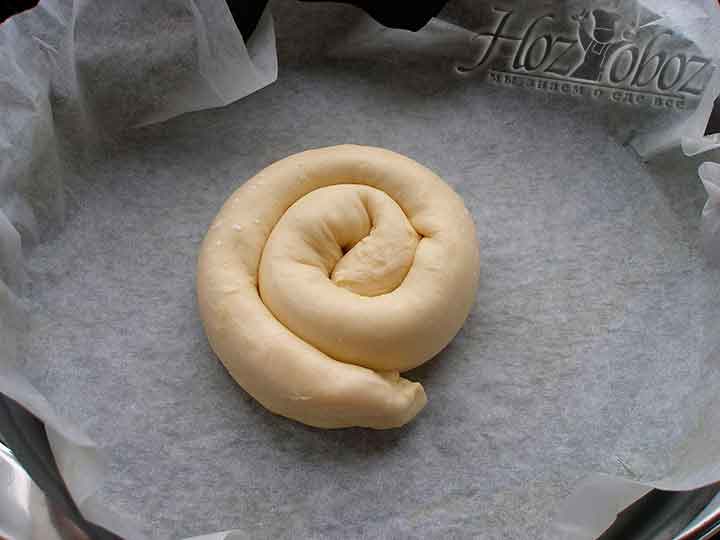
Place the first tube like like a spiral in the middle of the baking dish.
- Place another tube rolling it around the first one.
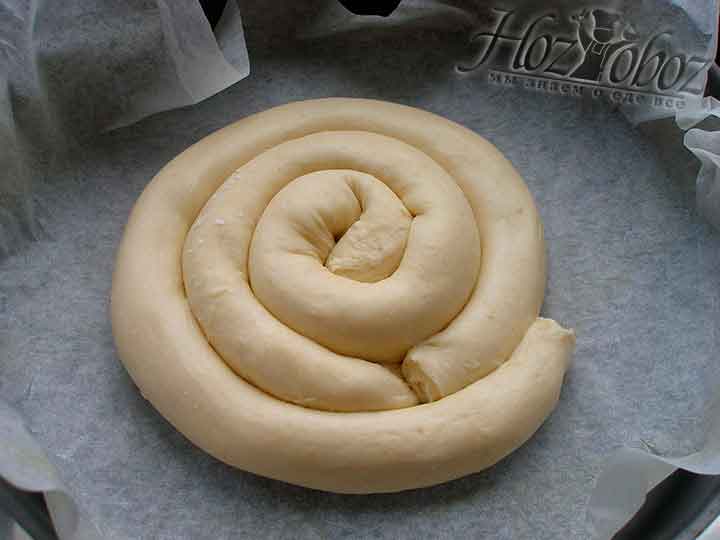
Roll the second tube around the first one to make a spiral bigger.
- Do just the same thing with the third tube.
Repeat with another tube.
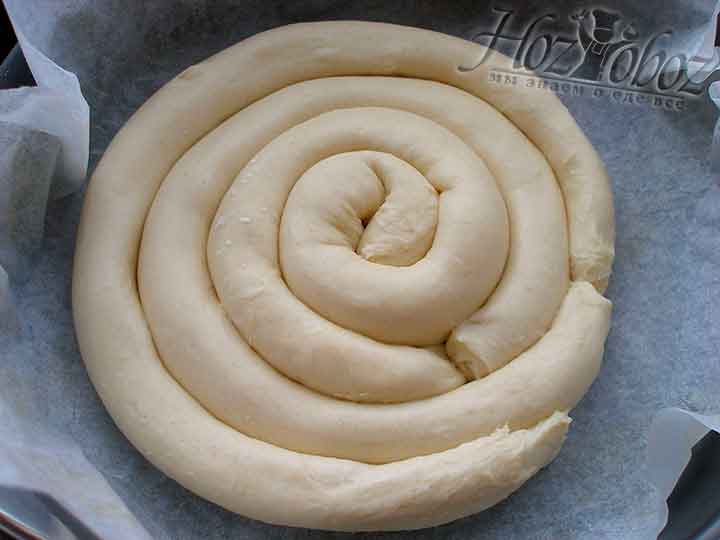
- Once more repeat the operation with the forth tube. Now we have a snail pie, which looks tasty even being uncooked.
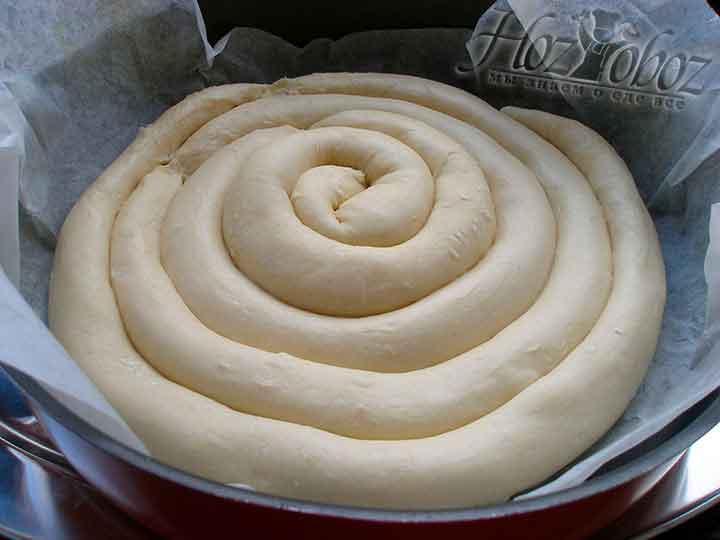
Now the forth tube is subject to the same operation and as a result, the whole baking dish is full with the spiral pie. Looks like a snail, doesn't it?
- Grease the pie with slightly beaten eggs and leave it for 20 minutes so that it rises a bit. Of course, the place for keeping the pie should be the warm one.
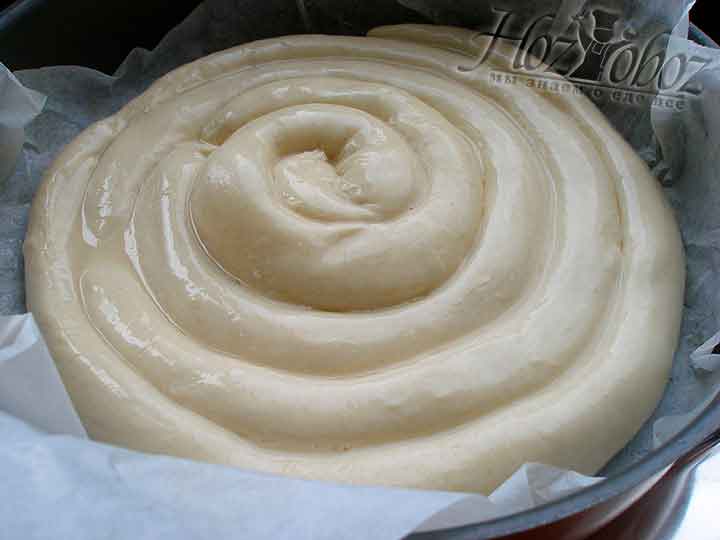
Then grease the pie with egg and leave it in a warm place for 20 minutes.
- Now put the pie into the preheat oven at 350F for 25-30 minutes. It may take some more time, so please watch the pie attentively.
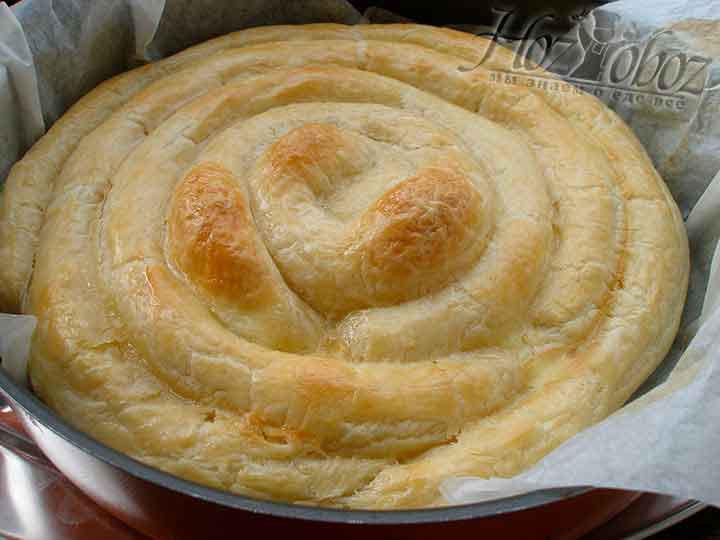
Bake the snail pie for half an hour at 350.
- Cover hot pie with a slightly damp towel and leave it for 15 minutes. That’s how it looks like from the other side.
As soon as your pie is ready, cover it with humid cloth for 15 minutes and only after that, cut it into slices.
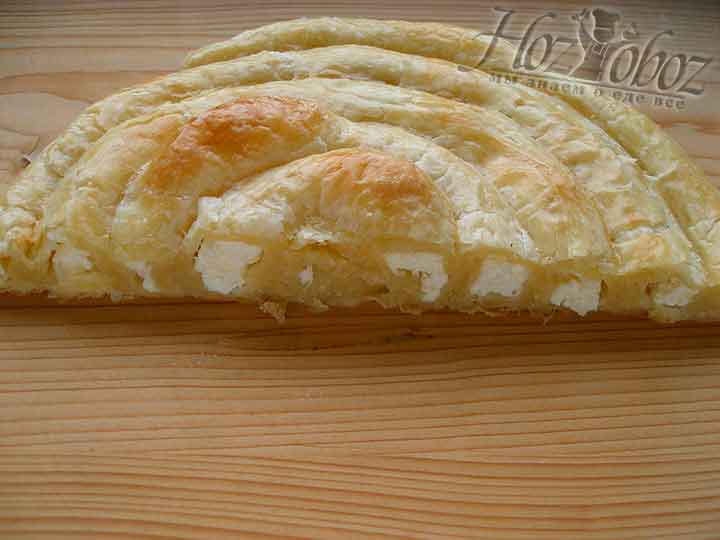
- Now that’s how you snail pie will look like when you cook it by yourself! Bon Appetite!

Could you imagine that your snail pie would look so extraordinary in the end? It’s ready to be served now!
So, the snail pie made of puff pastry is ready! You may invent your own filling instead of cottage cheese. For example, this may be snail pie with cherries or with spinach. Anyway, now you’re familiar with the dough basis and the method of cooking the snail pie. Don’t forget that you can always revise the recipe of the snail pie with photos, just look for it on HozOboz website.